Cremur Tips & Tricks

How to change a Radiator Valve
Our step-by-step guide outlines the basic process for changing a radiator valve. Please note that each system is different, and so you should always refer to the installation spec and consult an expert if you’re ever in doubt.
If you decide to have a go yourself, you’ll need:
- A hosepipe
- A bucket
- Some old towels
- An adjustable spanner or star key
- A wrench
- A bleed key
Switch off the water supply and the boiler
Before you get started, make sure the water supply to your heating system is switched off and turn your boiler off – if you’re unsure of how this works, you might want to switch off your electricity completely.
Always consult a professional if you need help – having a dry system when the pump turns out can overheat your boiler and even burn the pump itself out. If you have any doubts about how your system operates, contact a heating engineer for assistance.
Use the drain off to get rid of excess water
Your drain off point is usually on the bottom floor of your house, located underneath the radiator. It allows you to drain out any excess water before you replace the valve. To do this, connect a hosepipe to the drain off and feed the pipe out of the nearest window.
Place a towel underneath the drain off in order to catch any leaks. Once the hose is firmly in place, turn the drain off using an adjustable spanner (or star key) to let the water out.
Open all the radiator bleed keys
Using a radiator bleed key, you now need to open up all the bleed keys on each radiator in your home. The bleed key is found on the top of your radiator, and opening them allows air to get into the system. As you do this, you should hear a quiet hissing noise as air flows into your radiator.
This step is important, as it prevents water from getting into your heating system by pushing it all to the bottom of your radiator. Once all the bleed keys have been opened, leave them to drain down for around 15 minutes.
Removing the old radiator valve
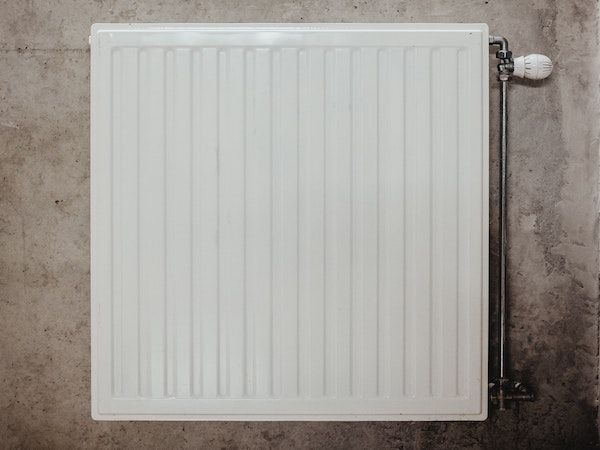
After placing a towel underneath the valve, use a spanner to undo the top nut of your old radiator valve. Do the same with the bottom nut. You should now be able to remove the valve completely, using a wrench to grip the valve body. It’s normal for a small amount of water to trickle out.
Using your wrench, remove the tail that connects the valve to your radiator. It can be tricky to get some leverage here, so use a spanner if this is the case. If you notice an excessive amount of water running out, reattach the hosepipe for a few minutes until it’s completely drained.
Fitting your new radiator valve
Replace the old radiator tail with the new one, and then slip the nut and olive onto the radiator tail. Slide the nut onto the water pipe before attaching the olive.
Next, connect your new radiator valve to the water pipe while simultaneously inserting it into the radiator tail. Once in place, use your wrench to tighten the tail nut, followed by the one on the bottom of the water pipe. The trick here is to make sure the tail nut is firmly in place, but not so tight that you would struggle to undo it.
Remove the cap from the top of the valve body, and connect the top of the valve to the valve body. Once in place, tighten it up a little with your spanner, again being careful not to make it too tight.
Switch your water supply back on
Before you switch the water back on, make sure you close all of the radiator valves, including all of the bleed valves. Make a note of how many times you have to turn your lock shield before it closes, as you’ll need to open it later with the exact same amount of turns.
When you’re confident all the radiator valves in your home have been turned off, you can switch the water back on. Water should now begin to flow back into your heating system. Don’t forget to check each radiator in your home to make sure there are no leaks!
Bleeding your radiator
Once you’re confident there aren’t any leaks, bleed your radiator of excess air, which prevents water from filling up your heating system. Next, open up your lock shield valve, using the exact same amount of turns as you did closing it earlier. The water can now run freely again.
Turn your boiler back on
Now it’s time to switch your boiler back on and find out if your hard work has paid off! Once switched on, wait for 90 minutes or so and then do a spot-check each of radiator to make sure they’re heating up and in good working order.
If you have any problems here, bear in mind that it could be something to do with the radiator itself, rather than the new valve. Always seek professional help if unsure.
Changing your old or broken valve with a more economical thermostatic valve saves you money and keeps your home at optimum temperature.

Tralee Showroom Opening Hours:
Mon to Sat: 8.30am - 5.30pm
Sun: 2.00pm – 5.00pm
Newcastle West Showroom Opening Hours:
Mon to Sat: 8.30am - 5.30pm
C.W.S. Complex
Upper Rock Street
Tralee, Co. Kerry
V92 YH5V
Call: (066) 7124555
Email: This email address is being protected from spambots. You need JavaScript enabled to view it.
St Mary's Rd,
Rathnaneane,
Newcastle West,
Co. Limerick,
V42 E029
Call: (069) 26013
Email: This email address is being protected from spambots. You need JavaScript enabled to view it.


